

Ever wondered how to transform an outdated space without the hassle of a complete renovation? Or perhaps you’re looking for a clever way to hide unsightly pipes and wiring while improving your room’s acoustics? If so, you’re in the right place.
Installing drop ceilings might just be the solution you’ve been searching for. Whether you’re tackling a home renovation project or upgrading a commercial space, drop ceilings offer a practical and cost-effective approach to ceiling improvements. They’re particularly popular in Australia for basements, offices, and retail spaces where easy access to services above the ceiling is essential.
In this guide, we’ll walk you through everything you need to know about drop ceiling installation. From understanding the basics and planning your project to the nitty-gritty of fitting suspended ceiling systems, we’ve got you covered. You’ll learn about the tools required, the step-by-step process for drop ceiling grid installation, common mistakes to avoid, and how to budget for your project. By the end, you’ll have the confidence to decide whether putting in drop ceilings is a DIY job or one best left to the professionals.
Table of Contents
What Is a Suspended Ceiling and How Does It Work?
A suspended ceiling, also known as a drop ceiling or false ceiling, is a secondary ceiling that hangs below the main structural ceiling. It consists of a metal grid framework suspended from the ceiling above using suspended ceiling hangers, with lightweight hung ceiling panels that sit within the grid.
The system works beautifully in its simplicity. Wall angles are fixed around the room’s perimeter, creating a ledge for the grid to rest on. Main runners span the length of the room, supported by wire hangers attached to the structural ceiling. Cross tees, then connect the main runners at regular intervals, forming a grid pattern that holds the ceiling tiles in place.
This design makes suspended ceilings incredibly practical. Need to access that dodgy plumbing or check on electrical wiring? Simply lift out a tile, and you’re in. No cutting, no patching, no drama. It’s this accessibility that makes drop-down ceiling installation so popular in both residential and commercial settings across Australia.
Benefits of Installing a Drop Ceiling
So why should you consider fitting drop ceilings? The advantages are genuinely impressive and extend well beyond simple aesthetics.
First up, there’s the easy access factor. Unlike fixed ceilings, drop ceilings allow you to reach plumbing, wiring, and HVAC systems whenever needed. This is a massive plus for maintenance and future modifications. Commercial spaces particularly benefit from this, as building codes often require accessible service areas.
The acoustic benefits are another major drawcard. Ceiling tiles used in drop ceilings are designed to absorb sound, making them ideal for offices, home theatres, and any space where noise reduction matters. Plus, suspended systems create an air gap that provides additional insulation, helping to regulate temperature and potentially reducing your energy bills.
Let’s talk cost. Installing drop ceilings is generally more affordable than traditional plastered ceilings, especially when you factor in labour costs. The materials are budget-friendly, and if you’re handy, you can save even more by taking on a drop ceiling installation project yourself.
Tools and Materials You’ll Need
Getting your toolkit sorted before you start is half the battle won. Here’s what you’ll need for fitting suspended ceiling systems.
Essential tools include a laser level (or water level), tape measure, chalk line, tin snips for cutting grid components, a sharp utility knife for tiles, a drill with masonry and wood bits, a pop rivet gun, a spirit level, a string line, and a sturdy stepladder. Safety gear like goggles and dust masks is also important.
For materials, you’ll need wall angles to run around the perimeter, main runners that span the room’s length, cross tees that create the grid pattern, suspended ceiling hangers (wire or clips), and, of course, your chosen hung ceiling panels. When selecting tiles, consider the room’s purpose. Standard mineral fibre tiles work well in most spaces, but for bathrooms and kitchens, look for moisture-resistant options that won’t sag or deteriorate in humid conditions.
Step-by-Step Drop Ceiling Grid Installation
Now for the exciting part—actually installing your drop ceiling grid. Follow these steps for a professional result.
Begin by marking your desired ceiling height around the room using a laser level. This line must be perfectly level; any errors here will show in the finished ceiling. Install the wall angle along this line, securing it with screws or masonry anchors depending on your wall type.
Next, plan your main runner positions, typically spaced 1200mm apart. Mark where each suspended ceiling hanger will attach to the structural ceiling above—these should be no more than 1200mm apart along each main runner. Install the hangers using appropriate fixings for your ceiling type.
Hang the main runners from the wire hangers, adjusting each one until perfectly level with your wall angle. Then snap in the cross tees at 600mm intervals to create your grid pattern. Double-check everything with a spirit level as you go.
Installing Drop Ceiling Tiles and Avoiding Common Mistakes
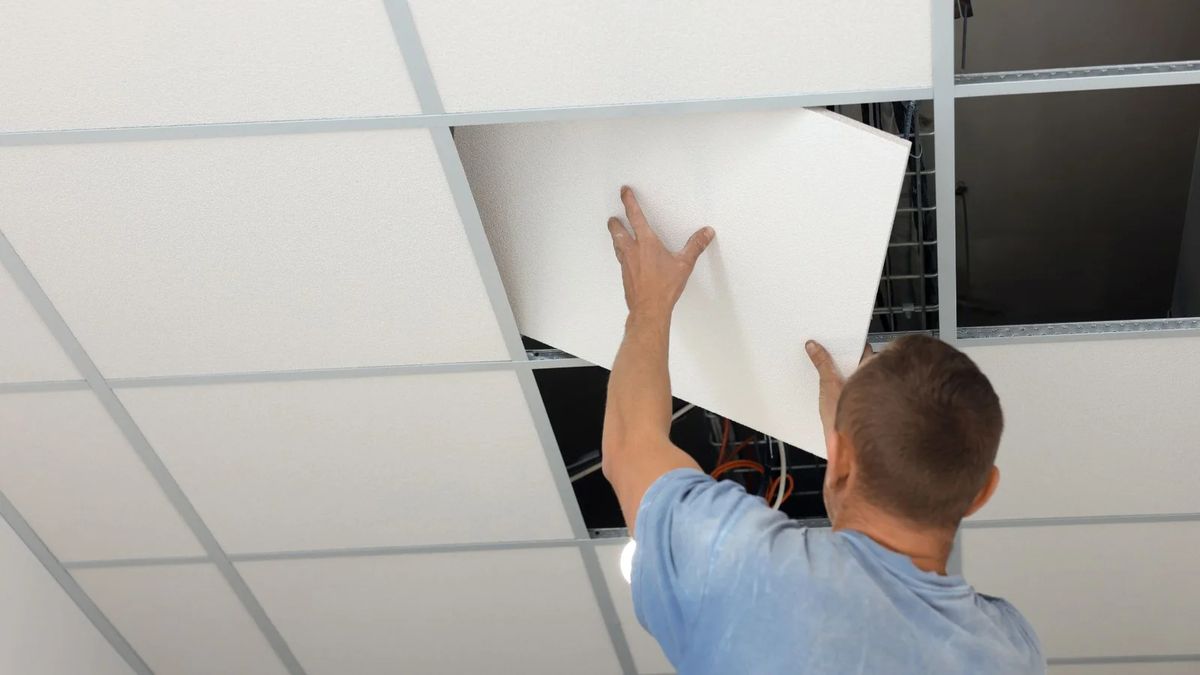
With your grid complete, installing drop ceiling tiles is surprisingly satisfying. Tilt each tile slightly, lift it above the grid, and lower it gently into place. For cuts around obstacles, measure carefully and use a sharp utility knife for clean edges.
Can you install a drop ceiling by yourself? Absolutely, though having a helper makes the job easier, particularly when handling long main runners or working in larger rooms. Solo installation is definitely achievable with patience and good planning.
Watch out for common mistakes that can ruin an otherwise good job. Incorrect spacing of suspended ceiling hangers leads to sagging over time. Failing to plan for lighting and ventilation fixtures before installation creates problems later. And if you do notice sagging? It’s usually fixable by adding extra hangers or replacing damaged grid components.
Final Thoughts on Drop Ceiling Installation
Installing drop ceilings is a genuinely achievable project that delivers impressive results. From concealing unsightly services to improving acoustics and insulation, the benefits make it worthwhile for both homes and commercial spaces.
The key to success lies in thorough planning, accurate measurements, and taking your time during drop ceiling grid installation. Whether you’re sourcing supplies from Bunnings Warehouse or specialist suppliers, choosing quality materials will make a noticeable difference to the finished result.
If heights aren’t your thing, the project feels overwhelming, or you’re dealing with a complex space, don’t hesitate to call in a professional for drop ceiling installation. Sometimes, that peace of mind is worth every dollar. Whatever you decide, you’re now equipped with the knowledge to make informed choices about your suspended ceiling project. Good luck!