
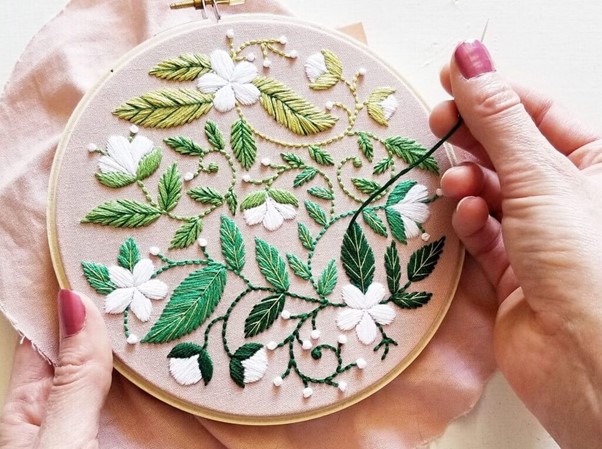
Have you ever scrolled through Instagram and spotted those gorgeous embroidered pieces that look like tiny works of art? Do you find yourself wondering whether you could create something beautiful with just a needle and thread? Perhaps you’ve been searching for a creative hobby that lets you switch off from screens and actually make something with your hands?
Embroidery is experiencing a massive revival right now, and it’s easy to see why. This timeless craft offers the perfect blend of creativity, relaxation, and practical skill-building. Whether you’re looking to personalise your denim jacket, create heartfelt handmade gifts, or simply find a meditative activity to unwind with after work, embroidery ticks all the boxes.
In this guide, you’ll discover everything you need to get started with basic embroidery stitches. We’ll cover the essential supplies, walk through the fundamental stitches every beginner should learn, and guide you through your first project from start to finish. By the end, you’ll have the confidence to pick up a needle and start creating your own embroidered masterpieces.
Table of Contents
What Do You Need To Start Embroidery?
Essential Embroidery Supplies For Beginners
Getting started with embroidery doesn’t require a massive investment. You’ll need just a handful of basic supplies to begin your stitching journey. The good news? Most craft stores in Australia stock beginner-friendly kits that include everything in one package.
Your starter kit should include embroidery needles (look for sizes 7-9 for general use), an embroidery hoop to keep your fabric taut, embroidery floss in various colours, and fabric to stitch on. You’ll also want a small pair of sharp scissors and a water-soluble fabric marker for transferring designs.
Many beginners find that purchasing a complete kit takes the guesswork out of shopping. These kits typically cost between $15-30 and include a pre-printed pattern, making them brilliant for first-timers who want to jump straight into stitching.
Choosing The Right Fabric And Thread
The fabric you choose makes a real difference to your stitching experience. Cotton and linen are ideal for beginners because they have a visible weave that helps guide your needle. Avoid stretchy fabrics or anything too loosely woven until you’ve built up your skills.
Embroidery floss typically comes in six-stranded threads that you can separate depending on your project. For most beginner projects, using two or three strands gives you nice coverage without being too bulky. Don’t stress about colour choices initially—start with a few basic shades and expand your collection as you go.
How To Set Up Your Embroidery Hoop
Your embroidery hoop keeps the fabric stretched tight, which makes stitching much easier. Loosen the screw on the outer ring, place your fabric over the inner ring, then press the outer ring down over the top. Tighten the screw until the fabric feels drum-tight.
Pull gently on the edges to remove any wrinkles, then retighten if needed. A properly tensioned hoop prevents puckering and makes your stitches look cleaner and more professional.
What Are The Basic Embroidery Stitches Every Beginner Should Learn?
Running Stitch: The Foundation Of All Embroidery
The running stitch is where everyone begins—it’s the most straightforward stitch in embroidery. Simply bring your needle up through the fabric, then push it back down a short distance away. Repeat this process, keeping your stitches evenly spaced.
This stitch creates a dashed line effect and works brilliantly for outlining shapes or adding simple details. Focus on keeping your stitches consistent in length, around 3-4mm each. Once you’ve mastered the running stitch, everything else builds on this foundation.
Backstitch: Creating Clean, Defined Lines
The backstitch creates solid, unbroken lines perfect for text, outlines, and fine details. Start by making one stitch forward, then bring your needle up one stitch length ahead. Now, go backwards to meet the end of your previous stitch.
This creates a continuous line without gaps. The backstitch is probably the most versatile stitch you’ll learn—it’s used in countless embroidery projects and gives a polished, professional look to any design.
Split Stitch: Adding Texture And Detail
The split stitch creates a braided effect that’s lovely for curved lines and organic shapes. Make a small straight stitch, then bring your needle up through the middle of that stitch, literally splitting the thread.
Continue this pattern, always coming up through the centre of your previous stitch. This technique creates a textured line that’s slightly thicker than backstitch and works beautifully for flower stems, lettering, and flowing designs.
Satin Stitch: Filling Shapes With Smooth Colour
When you want to fill in a shape with solid colour, satin stitch is your go-to technique. Work parallel stitches very close together, keeping them straight and even. The stitches should sit right next to each other without overlapping or leaving gaps.
Start with small shapes while you’re learning—a leaf or heart works perfectly. Satin stitch requires patience, but the smooth, glossy finish is worth the effort. Keep your thread tension consistent to avoid puckering.
French Knots: Mastering Decorative Dots
French knots look intimidating but become second nature with practice. Bring your needle up, wrap the thread around it twice, then push the needle back down very close to where it came up while holding the wraps tight.
These little knots are perfect for flower centres, eyes, scattered dots, and decorative details. The key is keeping tension on the thread as you pull it through. Don’t worry if your first attempts look wonky—French knots take a bit of practice to perfect.
Chain Stitch: Versatile Loops For Outlines And Fills
Chain stitch creates a series of connected loops that look like a delicate chain. Bring your needle up, then insert it right next to where it emerged. Before pulling through, bring the needle up a short distance ahead, catching the thread loop under the needle.
This stitch is incredibly versatile—use it for bold outlines, fill entire shapes by working rows side by side, or create beautiful floral designs. It’s particularly effective for curved lines and adds lovely texture to any project.
How Do You Transfer Embroidery Patterns Onto Fabric?
Getting your design onto fabric might seem tricky, but there are several beginner-friendly methods. The simplest approach uses a water-soluble fabric marker and a light source. Place your pattern behind your fabric, hold both against a window or lightbox, and trace the design directly onto the fabric.
For darker fabrics, transfer paper works brilliantly. Place the transfer paper face-down on your fabric, put your pattern on top, and trace firmly with a ballpoint pen. The pressure transfers the design onto the fabric below.
Pre-printed patterns and iron-on transfers are also fantastic options for beginners who want to skip this step entirely. Many embroidery kits come with designs already printed on the fabric, letting you focus purely on your stitching.
Step-By-Step Guide: Your First Simple Embroidery Project
Choosing A Beginner-Friendly Pattern
For your first project, stick with simple designs featuring basic shapes and limited colours. A small floral motif, a simple word, or a geometric pattern works perfectly. Avoid anything too detailed or larger than your palm—you’ll build up to bigger projects over time.
Look for patterns specifically labelled for beginners, which typically use only the stitches covered in this guide. Many free patterns are available online through Pinterest and embroidery blogs.
Working Through Your Design From Start To Finish
Start by securing your fabric in your hoop and gathering your chosen thread colours. Thread your needle with about 45cm of floss—any longer and it tends to tangle. Tie a small knot at the end.
Work from the background to the foreground, completing each colour section before moving on. When you finish a section, secure your thread on the back with a few small stitches through existing work. Take breaks to step back and admire your progress—embroidery is meant to be enjoyable!
Is Embroidery Hard To Learn? Common Beginner Mistakes And How To Avoid Them
Embroidery isn’t difficult—it just requires patience and practice. The most common mistake beginners make is pulling their stitches too tight, which causes fabric puckering. Keep your tension relaxed and consistent throughout your work.
Another frequent issue is using thread that’s too long, leading to tangles and frustration. Stick to arm’s length pieces. Also, make sure your fabric is properly tensioned in your hoop—retighten it regularly as you work.
How Long Does It Take To Learn Basic Embroidery Stitches?
Most people can learn the fundamental stitches within a few hours of practice. However, becoming truly comfortable and consistent typically takes a few weeks of regular stitching. The key is practice, not perfection.
Set aside 15-30 minutes several times a week rather than occasional marathon sessions. Your muscle memory develops faster with consistent, shorter practice periods.
Tips For Practising And Improving Your Embroidery Skills
Building Consistency And Confidence
Create a sampler piece where you practise each stitch without worrying about a finished project. This removes pressure and lets you experiment freely. Keep your early projects—you’ll love looking back at how far you’ve come.
Joining Local Embroidery Groups And Online Communities
Facebook groups and local craft meetups offer brilliant support and inspiration. Sharing your work, asking questions, and seeing others’ creations keeps motivation high. The embroidery community is wonderfully welcoming to beginners.
What Is The Easiest Embroidery Stitch For Beginners?
The running stitch is undoubtedly the easiest stitch to master. It requires nothing more than moving your needle up and down through the fabric in a straight line. Once you’re comfortable with this, the backstitch is the natural next step.
Your Embroidery Journey Starts Here
You’ve now got everything you need to begin your embroidery adventure. From gathering supplies and setting up your hoop to mastering six essential stitches, you’re ready to create your first project. Remember, every expert embroiderer started exactly where you are now.
The beauty of embroidery lies in its accessibility and versatility. You can stitch anywhere—on the train, in front of the telly, or in your favourite café. It’s a wonderfully portable craft that grows with you as your skills develop.
So grab a needle, choose a simple pattern, and make your first stitch today. Don’t worry about perfection—embrace the handmade quality that makes embroidery so charming. Your creative journey begins with that very first stitch, and trust me, there’s nothing quite like the satisfaction of completing your first embroidered piece. Happy stitching!
