
Table of Contents
Introduction
The Toy Story film series is one of the most treasured foundations anytime made. There are four motion pictures in the key series as well as vast Projects, PC games, books and other item centered around these characters. One of the chief characters is the cowpoke toy, Woody. Fans love this individual on account of his taunting yet respectable nature, and his journey of sorting out some way to be less burning and rely upon his buddies has amazed swarms. Learn This blog and visit the more drawing ideas.
Sorting out some way to draw Woody is a unimaginable strategy for with respect to this model individual! If you love this individual, there will be an extraordinary arrangement to esteem in this educational activity. Our step by step guide on the most capable technique to draw in Woody just 6 phases will let you know the most effective way to helpfully duplicate this notable farmer toy.
Stage 1 – Woody Drawing
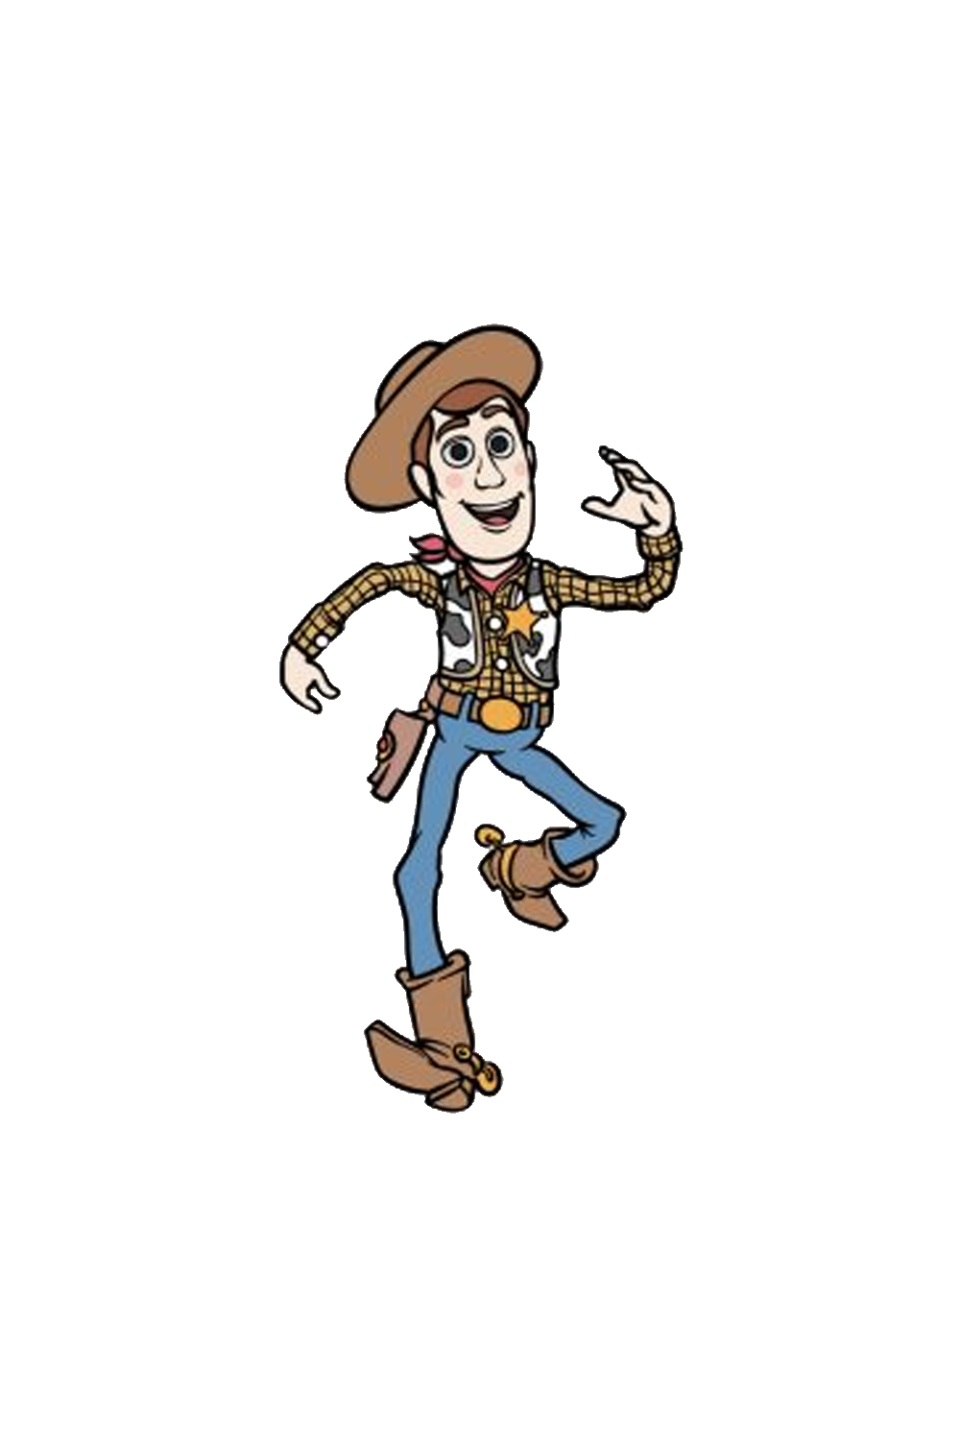
This underlying step of our assistant on the most capable technique to draw Woody will see you beginning the drawing by drawing his head. Woody’s head is exceptionally modest and long, so you can start by characterizing a changed limit to make this shape as it appears in the reference picture. Then, characterize a more unobtrusive twisted limit for the groundwork of his neck under it.
Then, draw his ears as a reconsideration close by a couple of stunning lines for his hair on the sides. Woody is frequently seen with his famous farmer cap, so we will moreover start drawing that. Characterize a changed limit over his head, and a while later add one more ready to move on and not look back for the most elevated place of the cap. Whenever you have drawn these perspectives, you’ll be ready for stage 2.
Stage 2 – Draw his facial components and his chest
To continue with this Woody drawing of yours, we will next draw his components as well as his chest. For the facial components, we will start with his eyes. His eyes are round in shape for specific colossal round understudies inside them. His eyelids will moreover be barely brought down for his look. Then, at that point, you can draw his eyebrows using a couple of fundamental shapes, and subsequently draw his nose and smiling mouth under.
Then, we will draw his chest. Woody wears a vest with cowskin plans on it, and this has his star-shaped sheriff’s recognizable proof prepared to continue on and not think back. Then, draw the buttons of his shirt between the vest, add his scarf and a while later draw his belt. Finish by pulling the gun holster on the left 50% of his waist and a while later it’s the best an open door for stage 3.
Stage 3 – By and by, draw his arms
In this helper on the most capable strategy to draw Woody, we will portray him in a strong running stance. To get this rolling, we will begin by drawing his arms. His arms are made of stuffed surface, so they will swing wildly around as he runs. Use a couple of twisted lines to portray his arms, with the one on the left determined down.
The one on the right will be raised a bit, and we’ll get an unrivaled gander at the hand on that arm. Make sure to similarly draw the changed square shape sections of his sleeves on his wrist! That’s all there is to it now, so you can now progress forward.
Stage 4 – Next, draw the starting points of his legs
Comparative as his arms, Woody’s legs are produced using floppy stuffed surface. As we draw them, they will be similarly whipping like the arms were. The leg on the left side will be straighter and extended further forward than the other one. That other leg will be a bit more turned, and this will help with showing that he is halfway.
You can similarly start drawing the top edges and first portions of his boots under his legs. We will leave the lower part of the boots undrawn until additional notification, but you will clean them off close by decisive nuances in the ensuing stage.
Stage 5 – Add the last nuances to your Woody drawing
This step of our assistant on the most capable strategy to draw Woody will be connected to finishing the last parts and nuances. To start, we will draw the lower part of his boots. For the boot on the left, we will see a dash of the underpinning of the shoe, while for the other one we will simply see the top.
You can finish the boots by drawing in the stirrups joined to the backs of them. Then, you can finish the drawing by adding the checkered guide to his shirt. Whenever that is drawn, you can moreover add your own special few contemplations! Perhaps you could draw in an establishment to parade your main scene from the film or maybe add a couple of extra characters from the motion pictures.
Stage 6 – Finish your Woody drawing with assortment
You’re ready to finish this Woody drawing for specific assortments! In our reference picture, we went with the ordinary assortments he is found in all through the films, so you can copy our manual for keep him looking exact. A piece of the assortments consolidate some brown for his cap and boots, yellow for his shirt and blue for his pants. Will you portray his normal assortment plan or will you maybe make your own Woody assortment by changing up the tones?
Whether or not you stick to his standard assortments, you can anyway have some assortment by investigating various roads with respect to the craftsmanship gadgets and mediums you pick.
Also Read ezine blog