
Table of Contents
1. Dreaming of a Patio? Start with the Right Slabs
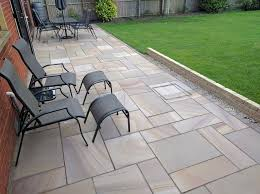
A patio is more than just a place to sit—it’s the heart of your garden where summer evenings stretch longer, barbecues happen, and friends gather. But achieving that perfect patio begins with the right foundation: paving slabs. Whether you’re after sleek Paving Slabs 900 X 600 for a modern look or Cheap Paving Slabs for a budget-friendly makeover, your choice will define the final style and durability.
The good news? You don’t need to be a professional landscaper to lay a patio. With a little preparation, the right tools, and some patience, you can create a beautiful outdoor space that lasts for years.
2. Choosing the Best Paving Slabs for Your Patio
Before lifting a single spade, you need to select your slabs. Larger sizes like Paving Slabs 900 X 600 are popular for contemporary patios because they create clean lines and a sleek finish. On the other hand, smaller slabs or even Cheap Paving Slabs can still look stunning when laid in a creative pattern.
Think about the vibe you want. Rustic sandstone offers warmth, while porcelain slabs deliver sharp sophistication. The key is to balance aesthetics with practicality, keeping in mind your budget and the level of maintenance you’re willing to handle.
3. Gather the Right Tools and Materials
Preparation makes everything easier. To install paving slabs, you’ll need a shovel, wheelbarrow, string line, spirit level, rubber mallet, and a pointing trowel. On the material side, stock up on sharp sand, hardcore (also known as MOT type 1), cement, and water.
Having everything ready before you begin saves you endless trips back and forth. Plus, it ensures you maintain momentum once the project kicks off—because stopping halfway to hunt for a spirit level isn’t fun.
4. Preparing the Groundwork
Every solid patio starts with solid groundwork. Begin by marking out the area with string and pegs. Dig down around 150–200mm, ensuring the ground is level. Don’t rush this stage; an uneven base will haunt you later when slabs rock underfoot.
Next, fill the dug-out area with a hardcore sub-base, about 100mm deep. Compact it thoroughly using a plate compactor or a hand tamper. This creates a stable foundation that prevents your slabs from shifting or sinking over time.
5. Creating the Perfect Base Layer
Once your hardcore is compacted, it’s time to add a bedding layer. Mix sharp sand with cement in a ratio of about 4:1 to create a mortar. Spread this mixture evenly across the sub-base at roughly 40mm depth.
This layer is crucial. It cushions your slabs while holding them securely in place. Don’t forget to create a gentle slope—around 1:60—so rainwater drains away instead of pooling on your patio.
6. Laying the Slabs with Precision
Now comes the exciting part—laying your slabs. Start in one corner and work your way out, placing each slab gently onto the mortar bed. Tap it down with a rubber mallet until it sits level with its neighbours.
If you’re using Paving Slabs 900 X 600, be mindful of their size and weight. It often helps to have a second pair of hands. For smaller or Cheap Paving Slabs, laying is easier but still requires patience. Always use a spirit level to check alignment as you go.
7. Spacing and Jointing the Slabs
Spacing makes all the difference between a professional finish and a rushed job. Leave joints of around 10–15mm between slabs to allow for pointing later. Use spacers if necessary to keep things uniform.
Once your slabs are in place, mix a mortar of sand and cement, and use a pointing trowel to fill the joints. Push the mortar firmly into the gaps and smooth it out for a neat finish. This step locks your slabs in place and prevents weeds from creeping in.
8. Finishing Touches for a Perfect Patio
After pointing, brush away excess mortar and leave the patio to set for at least 24–48 hours. Avoid stepping on the slabs during this time, as the mortar needs to harden fully. Once dry, give the surface a thorough sweep to clear dust and debris.
At this stage, you can add personal touches—like potted plants, outdoor furniture, or decorative lighting. Your patio should now look polished, durable, and ready to impress guests.
9. Tips for Maintenance and Longevity
A patio isn’t a one-and-done job; it requires a little care. Sweep regularly to prevent dirt build-up, and wash with a mild detergent to keep stains at bay. Reseal natural stone slabs every few years to protect them from weathering.
If you chose Cheap Paving Slabs, maintenance becomes even more important to extend their lifespan. For premium Paving Slabs 900 X 600, the focus should be on preventing chips and ensuring joints remain intact. A little care goes a long way in preserving your hard work.
10. Wrapping It Up: Build It Once, Enjoy It Forever
Installing paving slabs might feel daunting at first, but step by step, the process becomes straightforward. From choosing the right materials to laying and jointing with care, the effort pays off in a patio that enhances both your garden and lifestyle.
Whether you opted for large-format slabs or budget-friendly alternatives, the satisfaction of sitting on a patio you built yourself is unmatched. With the right approach, your patio won’t just look perfect—it will stand the test of time.