
In today’s world, where security is paramount, installing security cameras at home has become an essential precaution for assuring safety and peace of mind. NewVisionServicesltd.com offers comprehensive guidance on setting up a security camera system seamlessly. This tutorial will help you through every step, from picking the correct equipment to installing and maintaining your security cameras successfully.
Table of Contents
Understanding the Basics
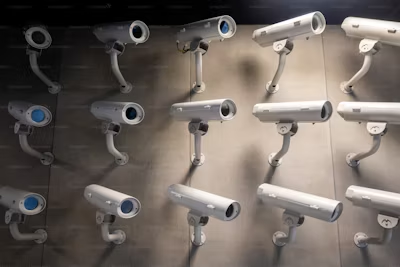
Before getting into the installation procedure, it’s necessary to understand the basics of security camera systems. A basic home security setup includes cameras, a digital video recorder (DVR) or network video recorder (NVR), power sources, and connections (unless you’re opting for a wireless system). Here’s a basic breakdown of the types of cameras you could encounter:
- Wired Cameras: These require a direct connection to a DVR or NVR and a power source. They offer reliable performance but can be challenging to install due to the need for extensive wiring.
- Wireless Cameras: These connect to your Wi-Fi network and are easier to install. However, they might face connectivity issues and require more frequent maintenance.
- Indoor Cameras: Designed for indoor use, these cameras are typically smaller and less weather-resistant.
- Outdoor Cameras: Built to withstand the elements, these cameras are more durable and often come with features like night vision and motion detection.
Step 1: Planning Your System
1. Assess Your Needs
Determine the regions of your home that require monitoring. Common sites include entrances, driveways, backyards, and common rooms inside the house. Identify potential blind spots and prioritize high-risk regions.
2. Decide on the Number of Cameras
Determine the number of cameras required based on your assessment. A normal home may require 4 to 8 cameras, although this number can vary depending on the size of the property and individual security requirements.
3. Choose Your Camera Types
Select the appropriate type of cameras for each location. For example, use weatherproof outdoor cameras for external areas and discreet indoor cameras for inside the home.
Step 2: Selecting Your Equipment
1. Camera Resolution
Higher resolution cameras produce crisper photos. Aim for at least 1080p resolution for clear and detailed video.
2. Night Vision
Make sure your cameras have night vision capabilities so they can record excellent images in low-light circumstances.
3. Field of View
Make sure your cameras have night vision capabilities so they can record excellent images in low-light circumstances.
4. Storage Options
Determine whether you prefer local storage (DVR/NVR) or cloud storage. Each has advantages and disadvantages; local storage has no ongoing fees but is prone to theft, whereas cloud storage is convenient but may require a membership.
Step 3: Installation Process
1. Gather Your Tools
You will need a drill, screws, anchors, a screwdriver, and a ladder. Ensure that you have all of the necessary components, such as cameras, power supply, cables, and, if needed, a DVR/NVR.
2. Mount the Cameras
- Indoor Cameras: Choose locations that provide a good overview of the area. Mount the cameras high on the wall or in the corners of the room to maximize coverage.
- Outdoor Cameras: Position these at least 9 feet above the ground to avoid tampering. Ensure they’re placed under eaves or other coverings to protect them from the elements.
3. Running Cables
For wired systems, plan the cable routes from the cameras to the DVR/NVR. Avoid running cables through high-traffic areas. Use cable clips or conduits to secure and protect the cables.
4. Connecting Wireless Cameras
For wireless systems, follow the manufacturer’s instructions to connect the cameras to your Wi-Fi network. Ensure a strong and stable connection to avoid connectivity issues.
5. Powering the Cameras
Wired cameras need to be connected to a power source, which might require running additional cables. For wireless cameras, make sure they’re within range of a power outlet or consider battery-operated options.
Step 4: Setting Up the Recording System
1. Configuring the DVR/NVR
Connect your DVR/NVR to a monitor and follow the setup instructions. Configure the system settings, such as date and time, recording modes (continuous or motion-detected), and storage preferences.
2. Setting Up Remote Access
Most modern systems offer remote access via a mobile app or web interface. Follow the instructions to set up remote viewing, allowing you to monitor your cameras from anywhere.
Step 5: Testing and Adjusting
1. Test Each Camera
Check the live feed from each camera to ensure it’s capturing the desired area. Make any necessary adjustments to the angle and focus.
2. Test Night Vision
Turn off the lights or wait until nighttime to test the night vision capabilities. Ensure the footage is clear and adequately illuminated.
3. Check Motion Detection
If your cameras have motion detection, test this feature by moving in front of the cameras. Adjust the sensitivity settings to reduce false alarms.
Step 6: Maintenance and Troubleshooting
1. Regular Inspections
Periodically check your cameras for dust, dirt, or obstructions. Clean the lenses as needed and ensure all components are securely mounted.
2. Software Updates
Keep your system’s firmware and software up to date to benefit from the latest features and security patches.
3. Troubleshooting Common Issues
- Poor Image Quality: Check the camera lens for dirt and ensure proper focus. Verify the resolution settings on your DVR/NVR.
- Connectivity Issues: For wireless cameras, ensure they’re within range of your Wi-Fi router and free from interference. Restart the router and cameras if necessary.
- Storage Problems: Ensure your storage device (hard drive or cloud storage) has enough space. Set up a recording schedule or overwrite settings to manage storage efficiently.
Additional Tips for Enhanced Security
1. Use Strong Passwords
Set strong, unique passwords for your cameras, DVR/NVR, and remote access accounts. Avoid default passwords to prevent unauthorized access.
2. Enable Encryption
Ensure your system uses encryption to protect your footage from being intercepted.
3. Back Up Important Footage
Regularly back up critical footage, especially if it captures significant events. Store backups securely, either on external drives or cloud storage.
4. Inform Your Household
Make sure everyone in your household is aware of the security system and knows how to use it. This includes understanding how to access the live feed and how to respond to alerts.
Conclusion
Installing security cameras in your house is an effective approach to improve the safety of your property and provide your family with peace of mind. Following these precise procedures will ensure that your home security system is installed correctly and operates efficiently. Remember that careful design, frequent maintenance, and staying up to date on the newest security techniques and technology are essential components of a dependable security system. A properly placed system allows you to monitor your property, dissuade possible burglars, and respond promptly to security events.